Handstand Mobility: Fix Your Shoulders, Wrists, and Spine
A diagnostic mobility guide for handstand: self-assessment tests for each limiting area, targeted drills for shoulders, wrists, and thoracic spine, and a daily routine.
Slow handstand progress is almost always blamed on insufficient training time or lack of strength. In most cases, the real culprit is a mobility limitation that the training program never directly addresses, and that forces the body to compensate in ways that make technique impossible to improve.
Why Mobility Is the Hidden Bottleneck in Handstand Training
Most athletes understand that the handstand requires strength and balance. Far fewer understand that it also requires specific ranges of motion, and that without them, the handstand cannot be mechanically correct regardless of how much strength or balance is present.
The connection is direct: if your shoulders cannot reach full overhead flexion, your arms will not stack vertically over your hands. To compensate, the body leans the torso past the wrists, which dramatically increases wrist load. The result is a banana-arch position where the lower back takes the shape the shoulder cannot, balance becomes nearly impossible to maintain, and the wrists fatigue rapidly. No amount of balance drilling will fix a problem rooted in restricted shoulder range.
The same logic applies to the wrists. In a handstand, the wrists function like ankles: they bear load and make tiny real-time adjustments that keep you balanced. If wrist extension is less than 90°, the joint cannot assume that role and instead concentrates load at the bone rather than distributing it through the soft tissue. This is why restricted wrist mobility is the most common cause of wrist pain in early handstand training.
Treating mobility as a diagnostic tool rather than a generic warm-up is the difference between identifying your specific bottleneck and spending months drilling the wrong thing.
Self-Assessment: Test Your Three Key Mobility Areas
Run all three tests before starting any targeted mobility work. They take under five minutes and will tell you exactly where to focus.
-
Shoulder test. Stand with your back flat against a wall, feet 15cm from the base. Without moving your feet or letting your lower back leave the wall, raise both arms overhead to touch the wall. If you cannot reach the wall, or if your lower back arches away from it to compensate, your shoulder flexion is restricted. That is the area to prioritize.
-
Wrist test. On hands and knees with arms straight below the shoulders, rock your bodyweight forward until your shoulders pass over your wrists. Can you reach 90° of wrist extension (hands flat on the floor with forearms vertical) without pain? If the wrists feel sharp or cannot reach that angle, wrist extension is a limiting factor.
-
Thoracic test. Stand against the wall again, back flat, feet slightly away. With arms raised overhead, is there a visible gap between your upper back and the wall? If so, thoracic extension is limited, which will force the lower back to arch in a handstand.
Failing one test is common. Failing two or more is typical for adult athletes who have not done dedicated mobility work, and it explains why the handstand keeps feeling wrong despite consistent practice.
Shoulder Flexion: Getting Your Arms Fully Overhead
Full shoulder flexion (arms alongside the ears with zero lower-back arch) is the single most important mobility requirement for the handstand. The primary limiting muscles are the lats, pecs, biceps, and teres major. All four pull the arm down and forward; when shortened, they resist the full overhead position.
Shoulder flexibility responds to daily end-range loading. Weekly stretching sessions produce very slow results. Aim for at least one shoulder mobility session every day, even if brief: five minutes of consistent daily work will outperform thirty minutes once a week.
Shoulder dislocates train the full rotational arc of the shoulder and are the most effective single drill for developing overhead range. Use a band or stick, grip wide, and rotate from front to back and back to front. Work through any tightness gradually and reduce grip width over time as flexibility improves.
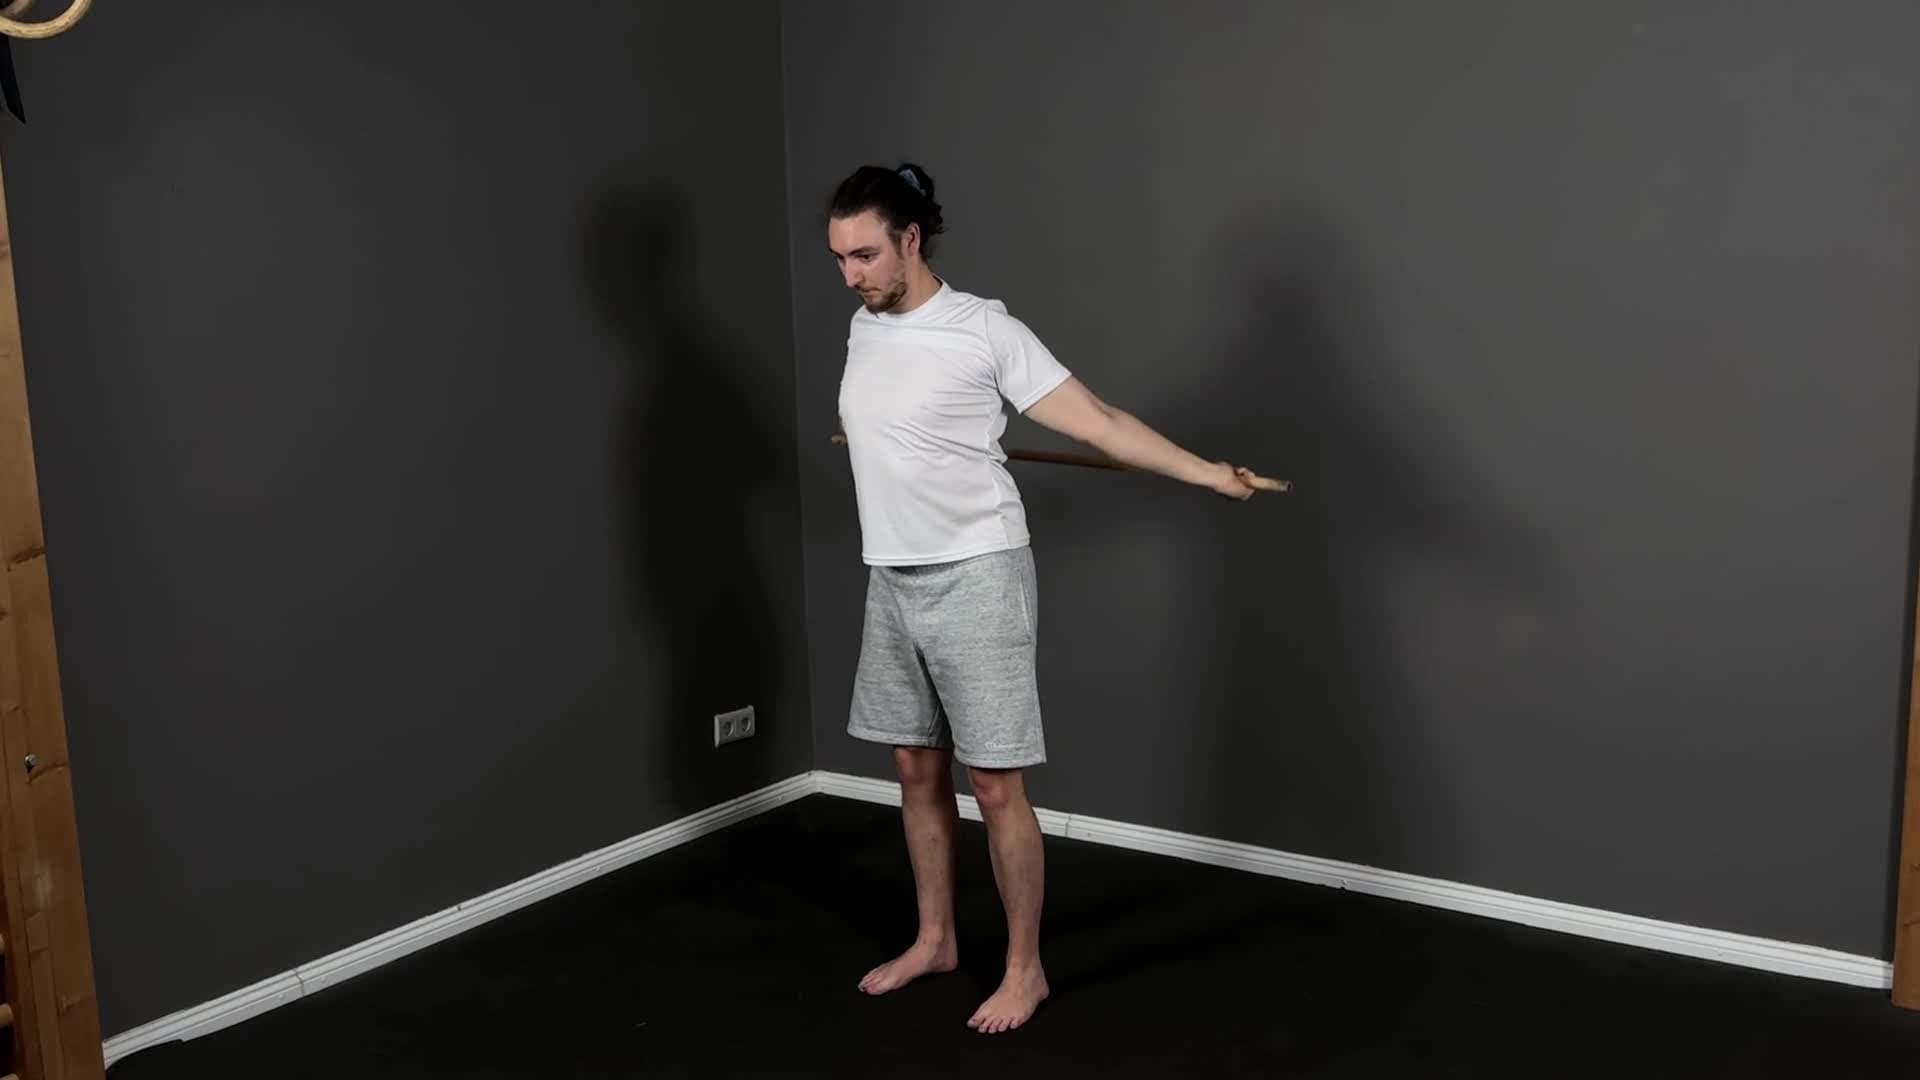
Shoulder dislocates
Houd een stok, band of touw met een brede greep vast (breder dan schouderbreedte). Begin met je armen gestrekt voor je lichaam
Overhead stretches provide passive end-range loading: holding the shoulder at its limit to create gradual tissue length. This directly addresses the overhead deficit identified in the shoulder test.
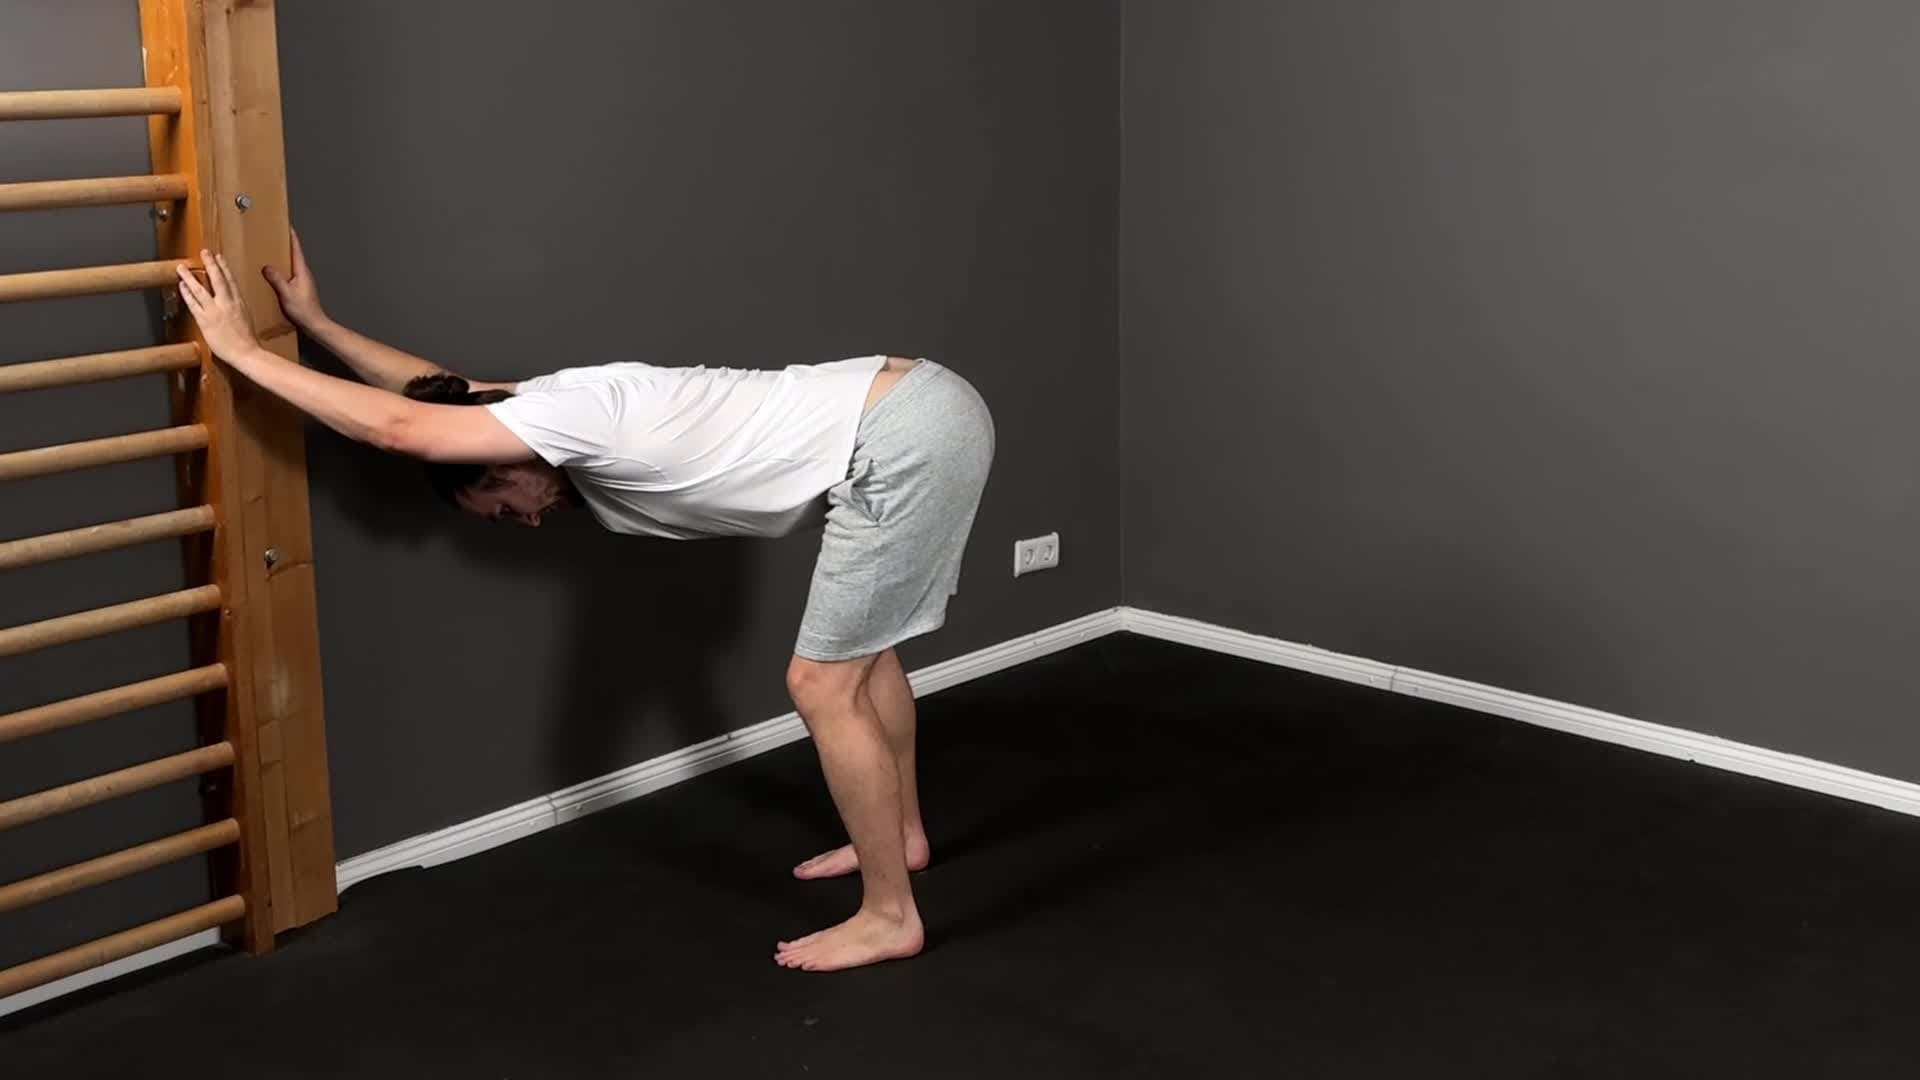
Bovenhandse rekkingen
Sta rechtop met je voeten op schouderbreedte. Til één of beide armen boven je hoofd
The biceps long head crosses the shoulder joint and limits flexion when tight: most athletes ignore it. Dedicated bicep stretching produces surprisingly fast improvements in overhead range.
Bicepsrekkingen
Strek één arm zijwaarts op schouderhoogte. Draai je handpalm naar achteren en pak een muur of deurpost vast
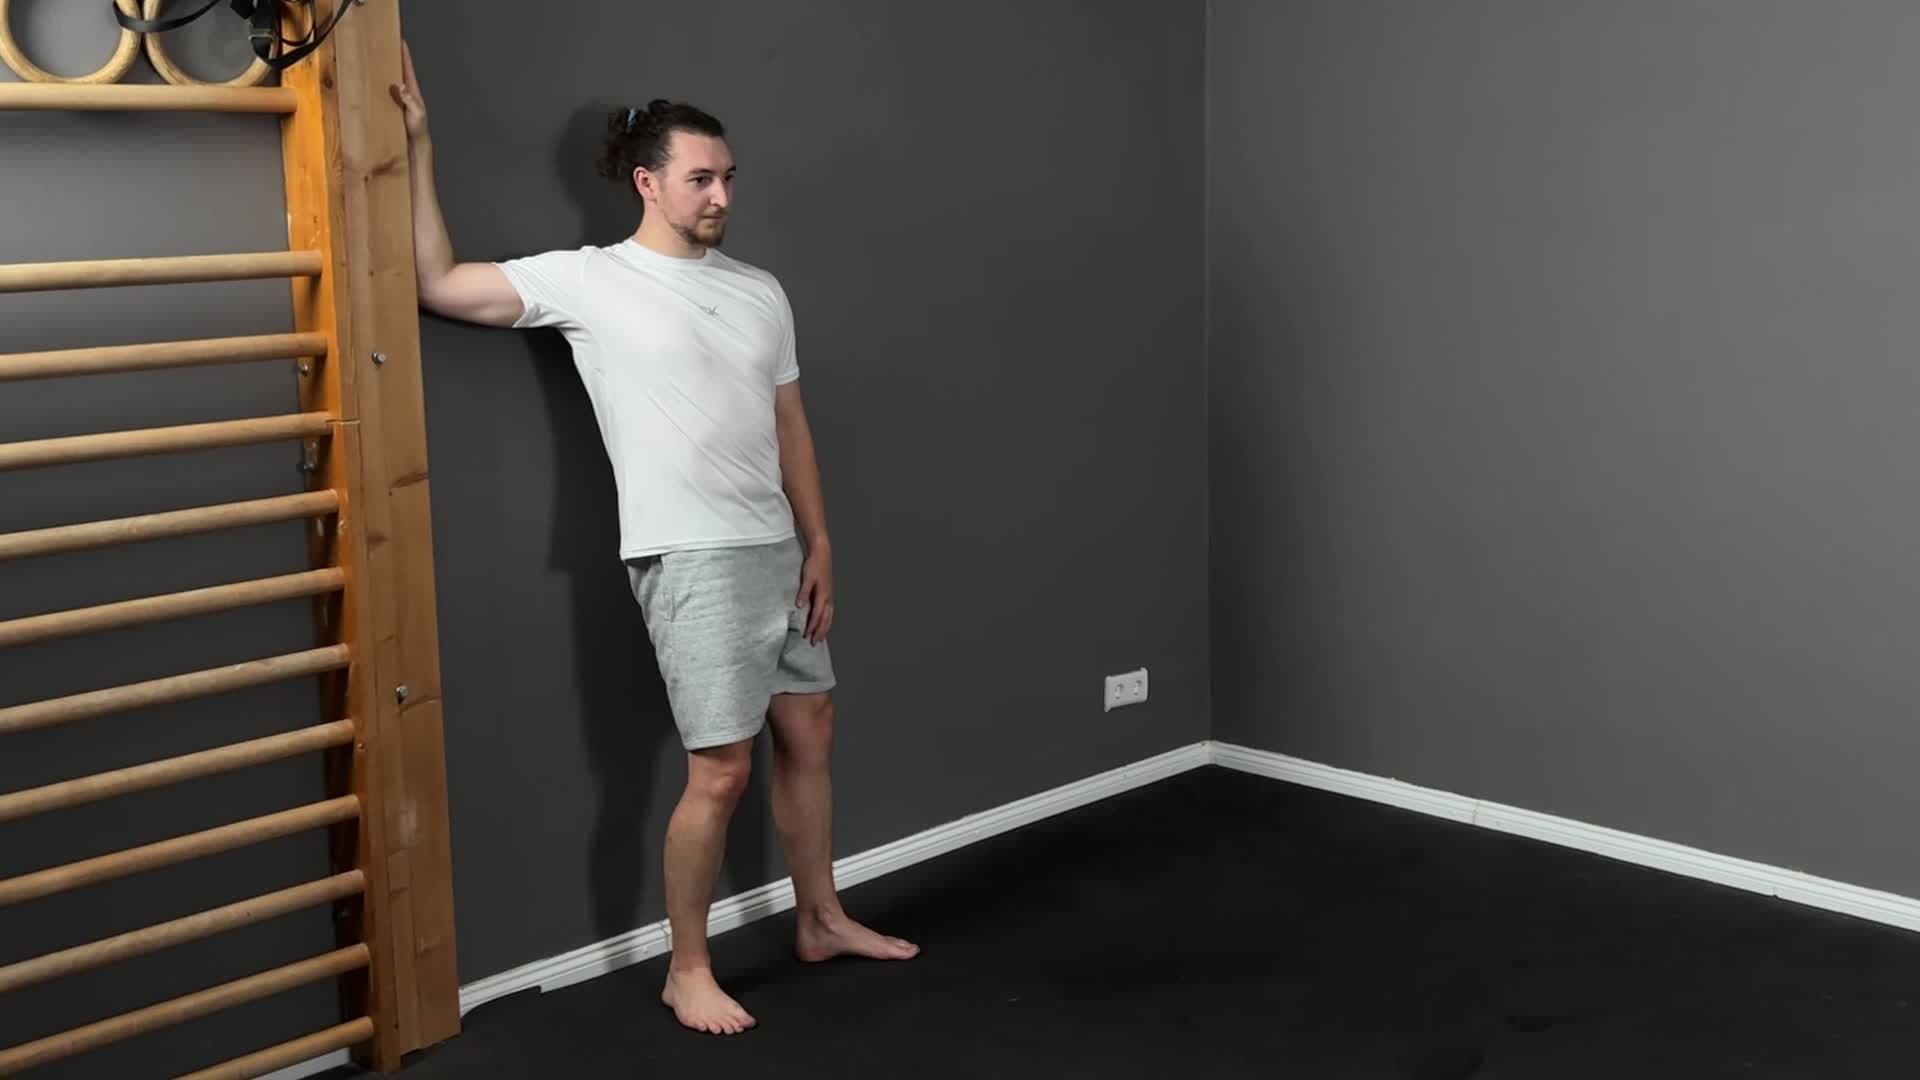
Borstrekkingen
Ga in een deuropening of tegen een muur staan. Zet je arm in een hoek van 90 graden tegen de muur
Expect 8-16 weeks of daily work to approach full 180° shoulder flexion if you are currently significantly restricted. Progress is consistent but not rapid: small daily gains compound into a meaningful change over two to four months.
Wrist Extension: Building the 90-Degree Foundation
Most adults have significantly restricted wrist extension from years of typing, gripping, and using their hands without ever loading the wrists in extension. Reaching 90° extension (the minimum for comfortable handstand weight-bearing) typically requires 4-8 weeks of progressive daily loading from a restricted starting point.
The approach must be progressive. Loading restricted wrists too aggressively too soon causes inflammation that sets the process back significantly. Start with small loaded ranges and expand gradually over weeks.
Wrist flexor work builds strength and control in the flexion direction, which creates the muscular balance that allows safe extension loading.
Polsbuigers
Ga op handen en knieën voor de rekvarianten. Zet je handpalmen plat met je vingers naar voren, of draai je handen met je vingers naar je knieën voor een diepere rek
Wrist extensor work directly targets the extension range and the muscles that control it. In a handstand, the extensors are what allow you to press into the floor to stop forward falling: weak extensors mean poor balance control even if the range is adequate.
Polsstrekkers
Ga op handen en knieën met de ruggen van je handen op de vloer. Wijs met je vingers naar je knieën om je polsstrekkers te rekken
A practical progression: start with tabletop wrist rocks (forward and backward, small range), then progress to active weight-bearing leans with increasing range over 3-4 weeks. The daily time requirement is low: two to three minutes per day is sufficient for consistent progress.
Key rule: wrist mobility work should never cause sharp joint pain. Pressure and mild discomfort during loading is normal; sharp or stabbing pain is a signal to reduce load and range immediately.
Thoracic Spine: Why Your Upper Back Affects Your Handstand
The thoracic spine (the twelve vertebrae of the mid and upper back) needs adequate extension mobility for the body to stack cleanly in a handstand. A stiff thoracic spine cannot extend to allow the upper back to flatten, so the lower back over-arches to compensate. This produces the banana-arch handstand: back curved, hips forward of the hands, balance disrupted.
Unlike shoulder or wrist mobility, thoracic stiffness is almost entirely a consequence of sedentary habits: prolonged sitting in a flexed position shortens the thoracic extensors and trains the upper spine into a kyphotic default. It is entirely reversible with consistent work.
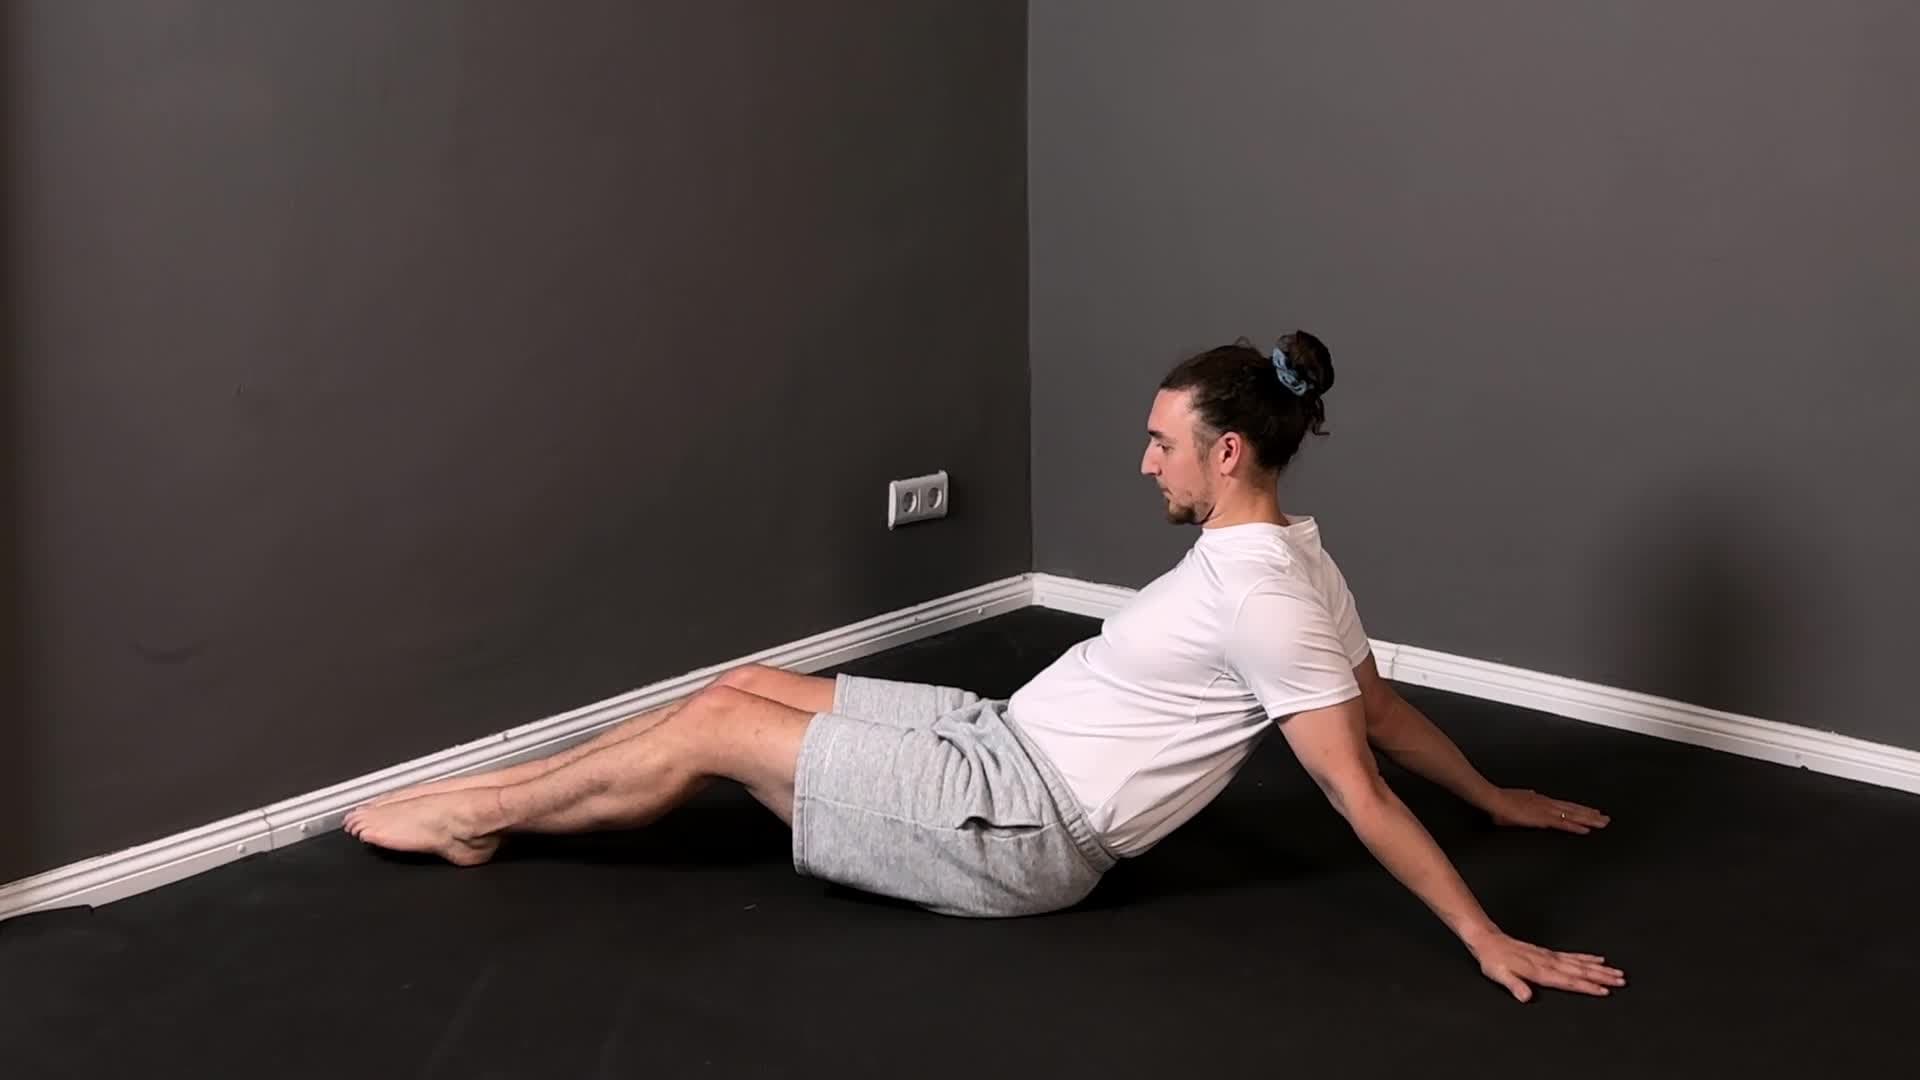
Spine flexion stretches work by loading the thoracic spine into controlled flexion, which creates the tissue extensibility needed for extension mobility. This might seem counterintuitive (training flexion to improve extension), but active loading through the full range in both directions is how joint mobility is built.
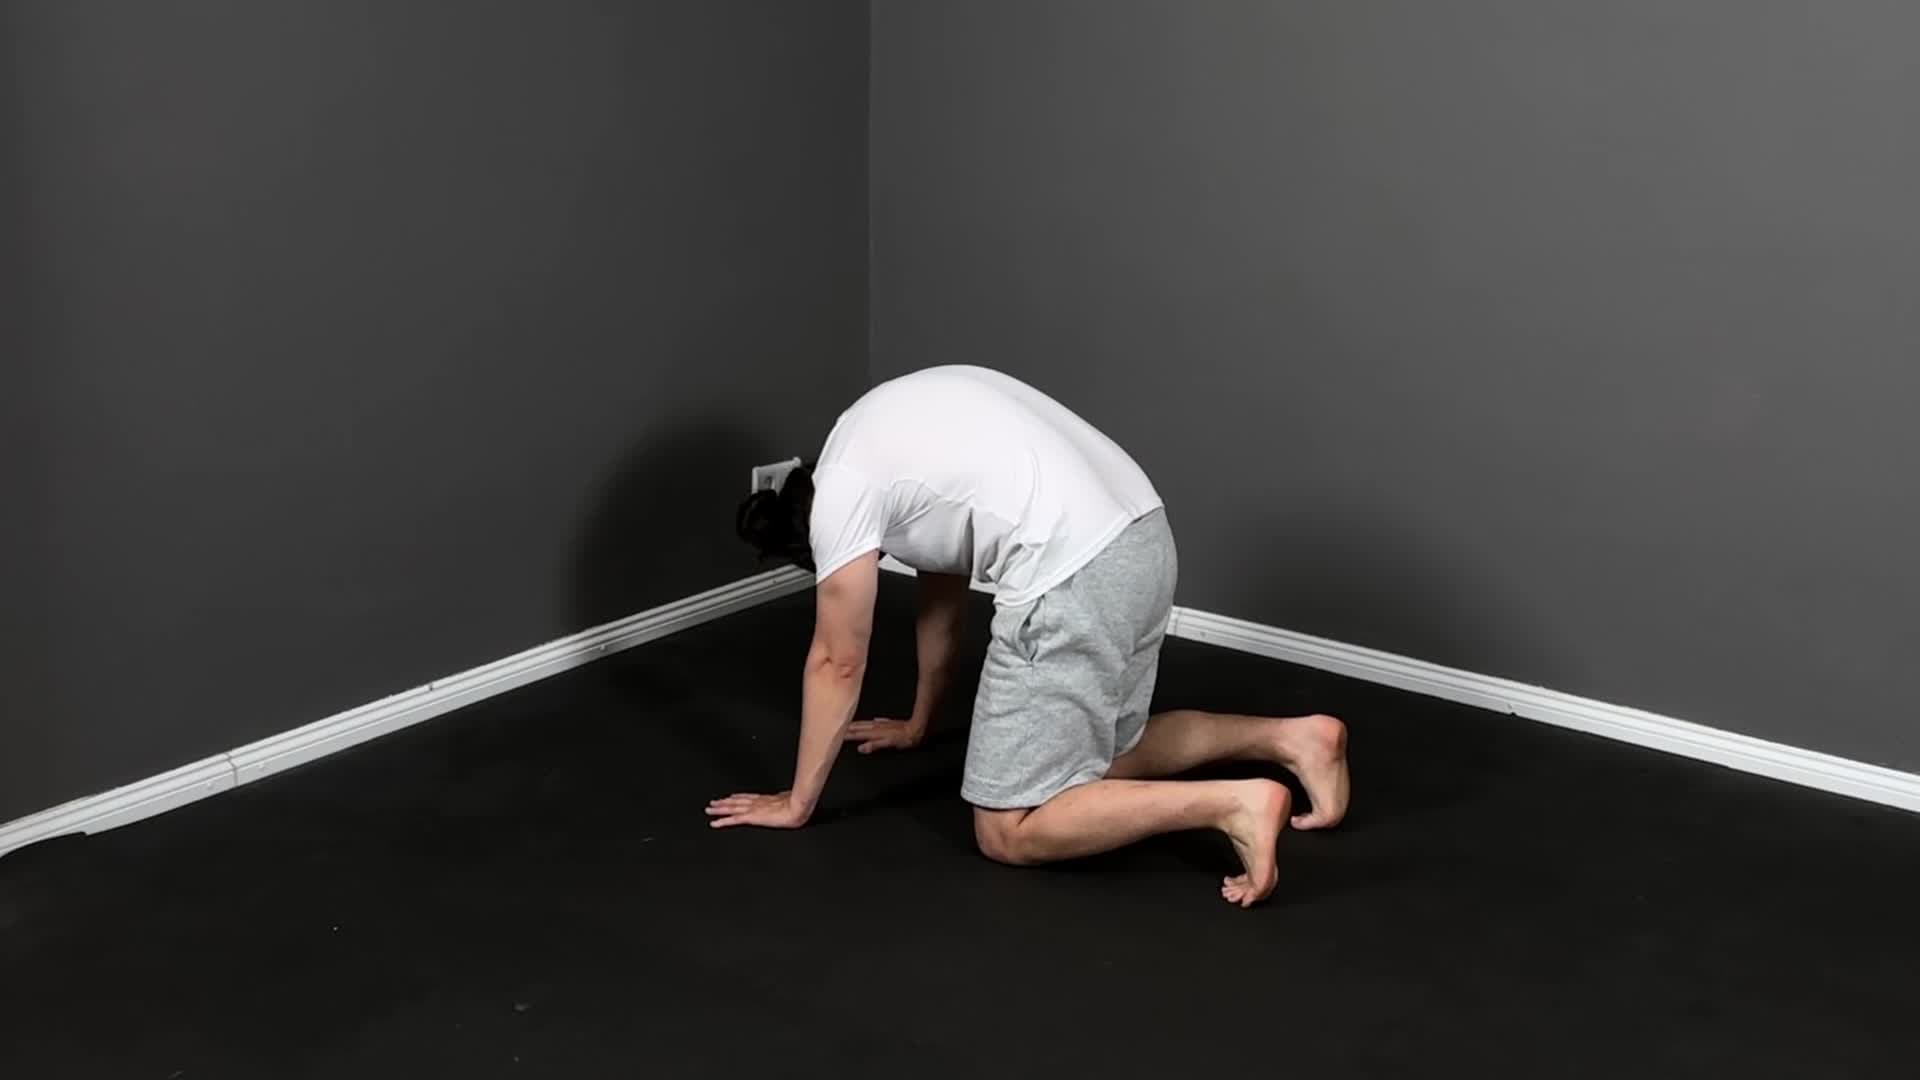
Rekoefeningen wervelkolomflexie
Begin rechtop met een neutrale wervelkolom.. Rol langzaam voorover wervel voor wervel, vanaf je hoofd omlaag door je borstwervelkolom.
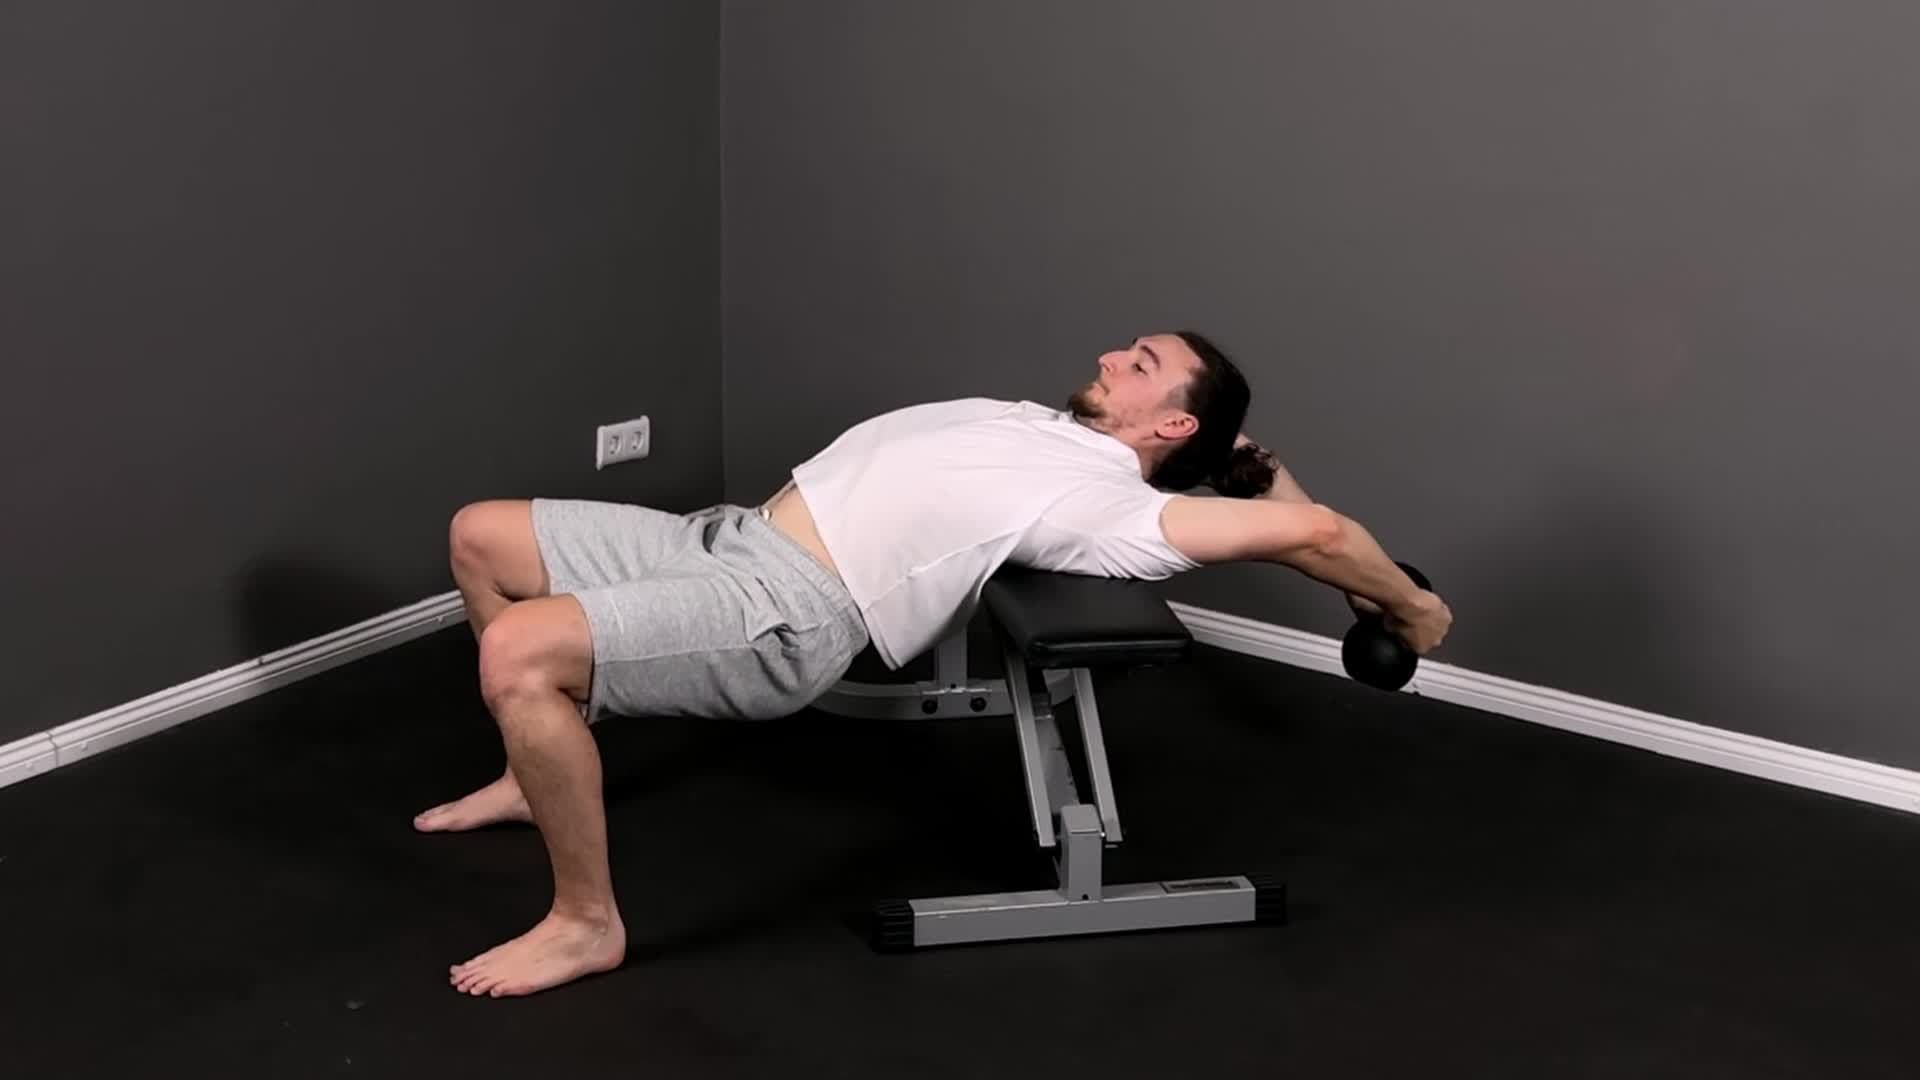
Pullovers progressions provide active overhead reach with the thoracic spine loaded: this is the most directly transferable drill to the handstand position because it trains active mobility rather than passive flexibility. Passive range gained in isolation often does not transfer to the handstand; active range does.
Pullover progressies
Ga op je rug op een bank of de vloer liggen. Houd een gewicht of stang met gestrekte armen boven je borst
Expect 8-12 weeks of consistent daily work for meaningful thoracic mobility change. This is the slowest area to adapt of the three, but the gains are durable once made.
A Simple Daily Mobility Routine for Handstand
Ten minutes of daily mobility work addresses all three areas with a minimum effective dose. Do this routine before handstand practice (as a warm-up, it prepares the joints for load) or as a standalone session on rest days.
| Area | Exercise | Duration |
|---|---|---|
| Wrists | Wrist Flexors + Wrist Extensors | 2 min total |
| Shoulders | Shoulder Dislocates | 2 min |
| Shoulders | Overhead Stretches + Bicep Stretches | 2 min |
| Thoracic | Spine Flexion Stretches | 2 min |
| Active overhead | Overhead Raise Progressions | 2 min |
The overhead raise progressions deserve emphasis: they train active shoulder mobility, not just passive range. Active mobility transfers directly to the handstand; passive stretching alone often does not.
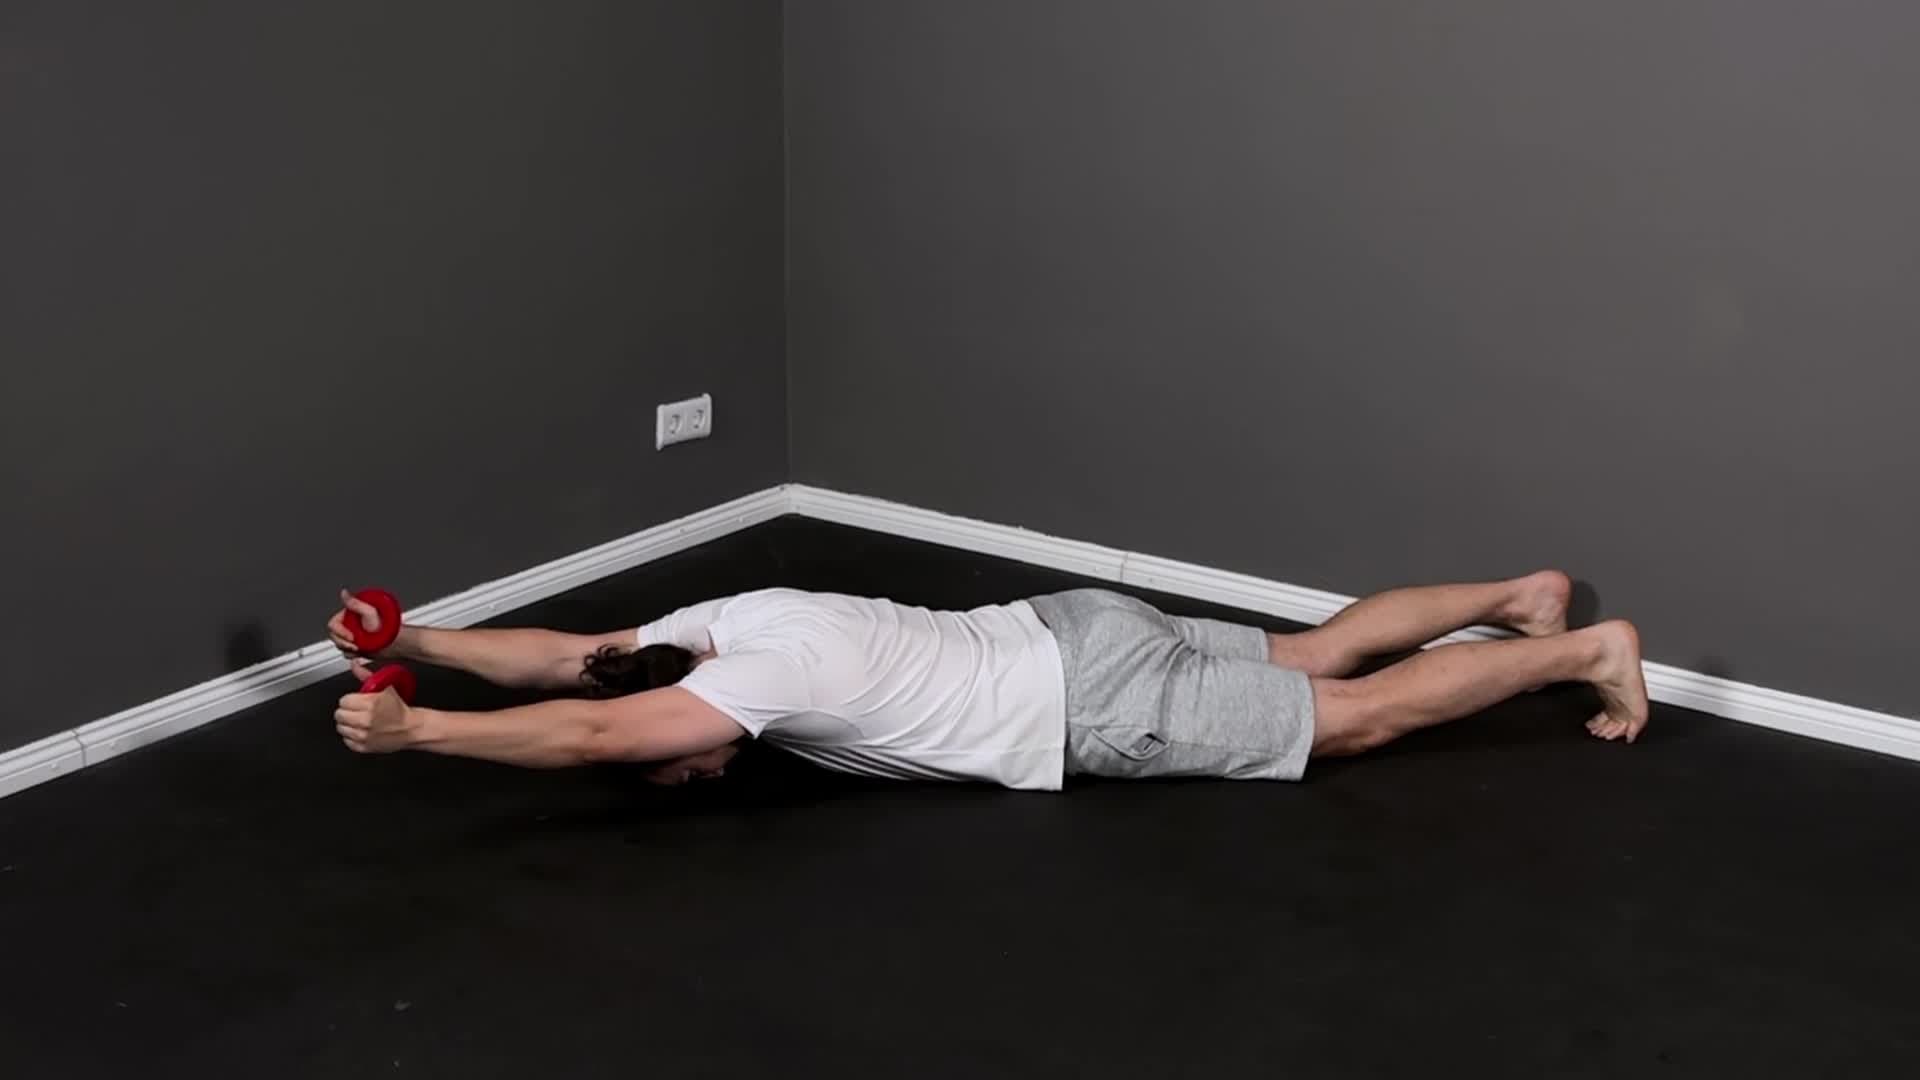
Bovenhandse raise progressies
Begin met je voeten op schouderbreedte en parallel. Houd de gewichten of band met een neutrale of bovengreep
For athletes with significant restrictions in one area, add an extra 5 minutes of targeted work for that specific area. Do not increase total session length beyond 20-25 minutes: beyond this, the tissues are fatigued and the returns diminish sharply.
The Simple Calisthenics app integrates mobility work directly into the handstand skill tree, scheduling each drill based on where you are in the progression.
How Long Does Handstand Mobility Take to Improve?
Set realistic expectations for each area and avoid the common mistake of doing intensive mobility work for two weeks, seeing small results, and concluding it is not working.
Wrist extension: 4-8 weeks of daily progressive loading to reach 90°. This is the fastest area to adapt because the wrist responds well to consistent load stimulus.
Shoulder flexion: 8-16 weeks to approach full 180°. The rate depends heavily on initial tightness: athletes with very restricted shoulders will need the upper end of this range. Consistency is the determining factor.
Thoracic mobility: 8-12 weeks for noticeable change. This is the slowest adapting area and the one most commonly neglected. Include it from the start rather than waiting until the other areas are resolved.
The critical principle across all three: passive flexibility is not enough. Passive end-range holds produce range, but that range will not reliably show up in the handstand unless it is also trained actively. The overhead raise progressions and pullovers bridge this gap, converting passive gains into functional handstand mobility.
Frequently asked questions
What mobility do you need for a handstand?
You need 180° shoulder flexion (arms fully overhead without lower-back arch), 90° wrist extension (wrists able to bear weight at a right angle), and enough thoracic mobility to maintain a stacked spine. Hamstring flexibility helps but is not a primary limiting factor for wall or freestanding handstands.
Can tight shoulders prevent a freestanding handstand?
Yes. Without full shoulder flexion, the arms cannot stack over the hands, forcing the body forward and placing excess load on the wrists. This creates the banana-arch position that makes balance nearly impossible. Shoulder mobility is the most common limiting factor for adult athletes learning handstands.
Do you need wrist flexibility for handstands?
Yes, at least 90° of pain-free wrist extension is required. In a handstand, the wrists act as your ankles: they absorb bodyweight and allow the small balance adjustments that keep you upright. Wrists that cannot reach 90° will be painfully overloaded at the joint rather than supported by the soft tissue structures.
Should I work on mobility before or after handstand practice?
Do deep passive stretching separately from balance practice, or at least 30 minutes before. Immediately after deep stretching, joint proprioception and force production are temporarily reduced, which impairs balance quality. Light wrist warm-up and gentle shoulder mobility are fine directly before handstand practice.
How long does it take to improve handstand mobility?
Wrist extension reaches 90° in most athletes within 4-8 weeks of daily practice. Shoulder flexion takes 8-16 weeks depending on initial tightness. Thoracic mobility takes 8-12 weeks for noticeable change. Daily 10-minute sessions consistently outperform occasional long sessions for all three areas.
Get a personalized handstand mobility routine inside the Simple Calisthenics app: shoulder, wrist, and thoracic work built into your skill progression from day one.
Gratis proberenFAQ
- What mobility do you need for a handstand?
- You need 180° shoulder flexion (arms fully overhead without lower-back arch), 90° wrist extension (wrists able to bear weight at a right angle), and enough thoracic mobility to maintain a stacked spine. Hamstring flexibility helps but is not a primary limiting factor for wall or freestanding handstands.
- Can tight shoulders prevent a freestanding handstand?
- Yes. Without full shoulder flexion, the arms cannot stack over the hands, forcing the body forward and placing excess load on the wrists. This creates the banana-arch position that makes balance nearly impossible. Shoulder mobility is the most common limiting factor for adult athletes learning handstands.
- Do you need wrist flexibility for handstands?
- Yes, at least 90° of pain-free wrist extension is required. In a handstand, the wrists act as your ankles: they absorb bodyweight and allow the small balance adjustments that keep you upright. Wrists that cannot reach 90° will be painfully overloaded at the joint rather than supported by the soft tissue structures.
- Should I work on mobility before or after handstand practice?
- Do deep passive stretching separately from balance practice, or at least 30 minutes before. Immediately after deep stretching, joint proprioception and force production are temporarily reduced, which impairs balance quality. Light wrist warm-up and gentle shoulder mobility are fine directly before handstand practice.
- How long does it take to improve handstand mobility?
- Wrist extension reaches 90° in most athletes within 4-8 weeks of daily practice. Shoulder flexion takes 8-16 weeks depending on initial tightness. Thoracic mobility takes 8-12 weeks for noticeable change. Daily 10-minute sessions consistently outperform occasional long sessions for all three areas.